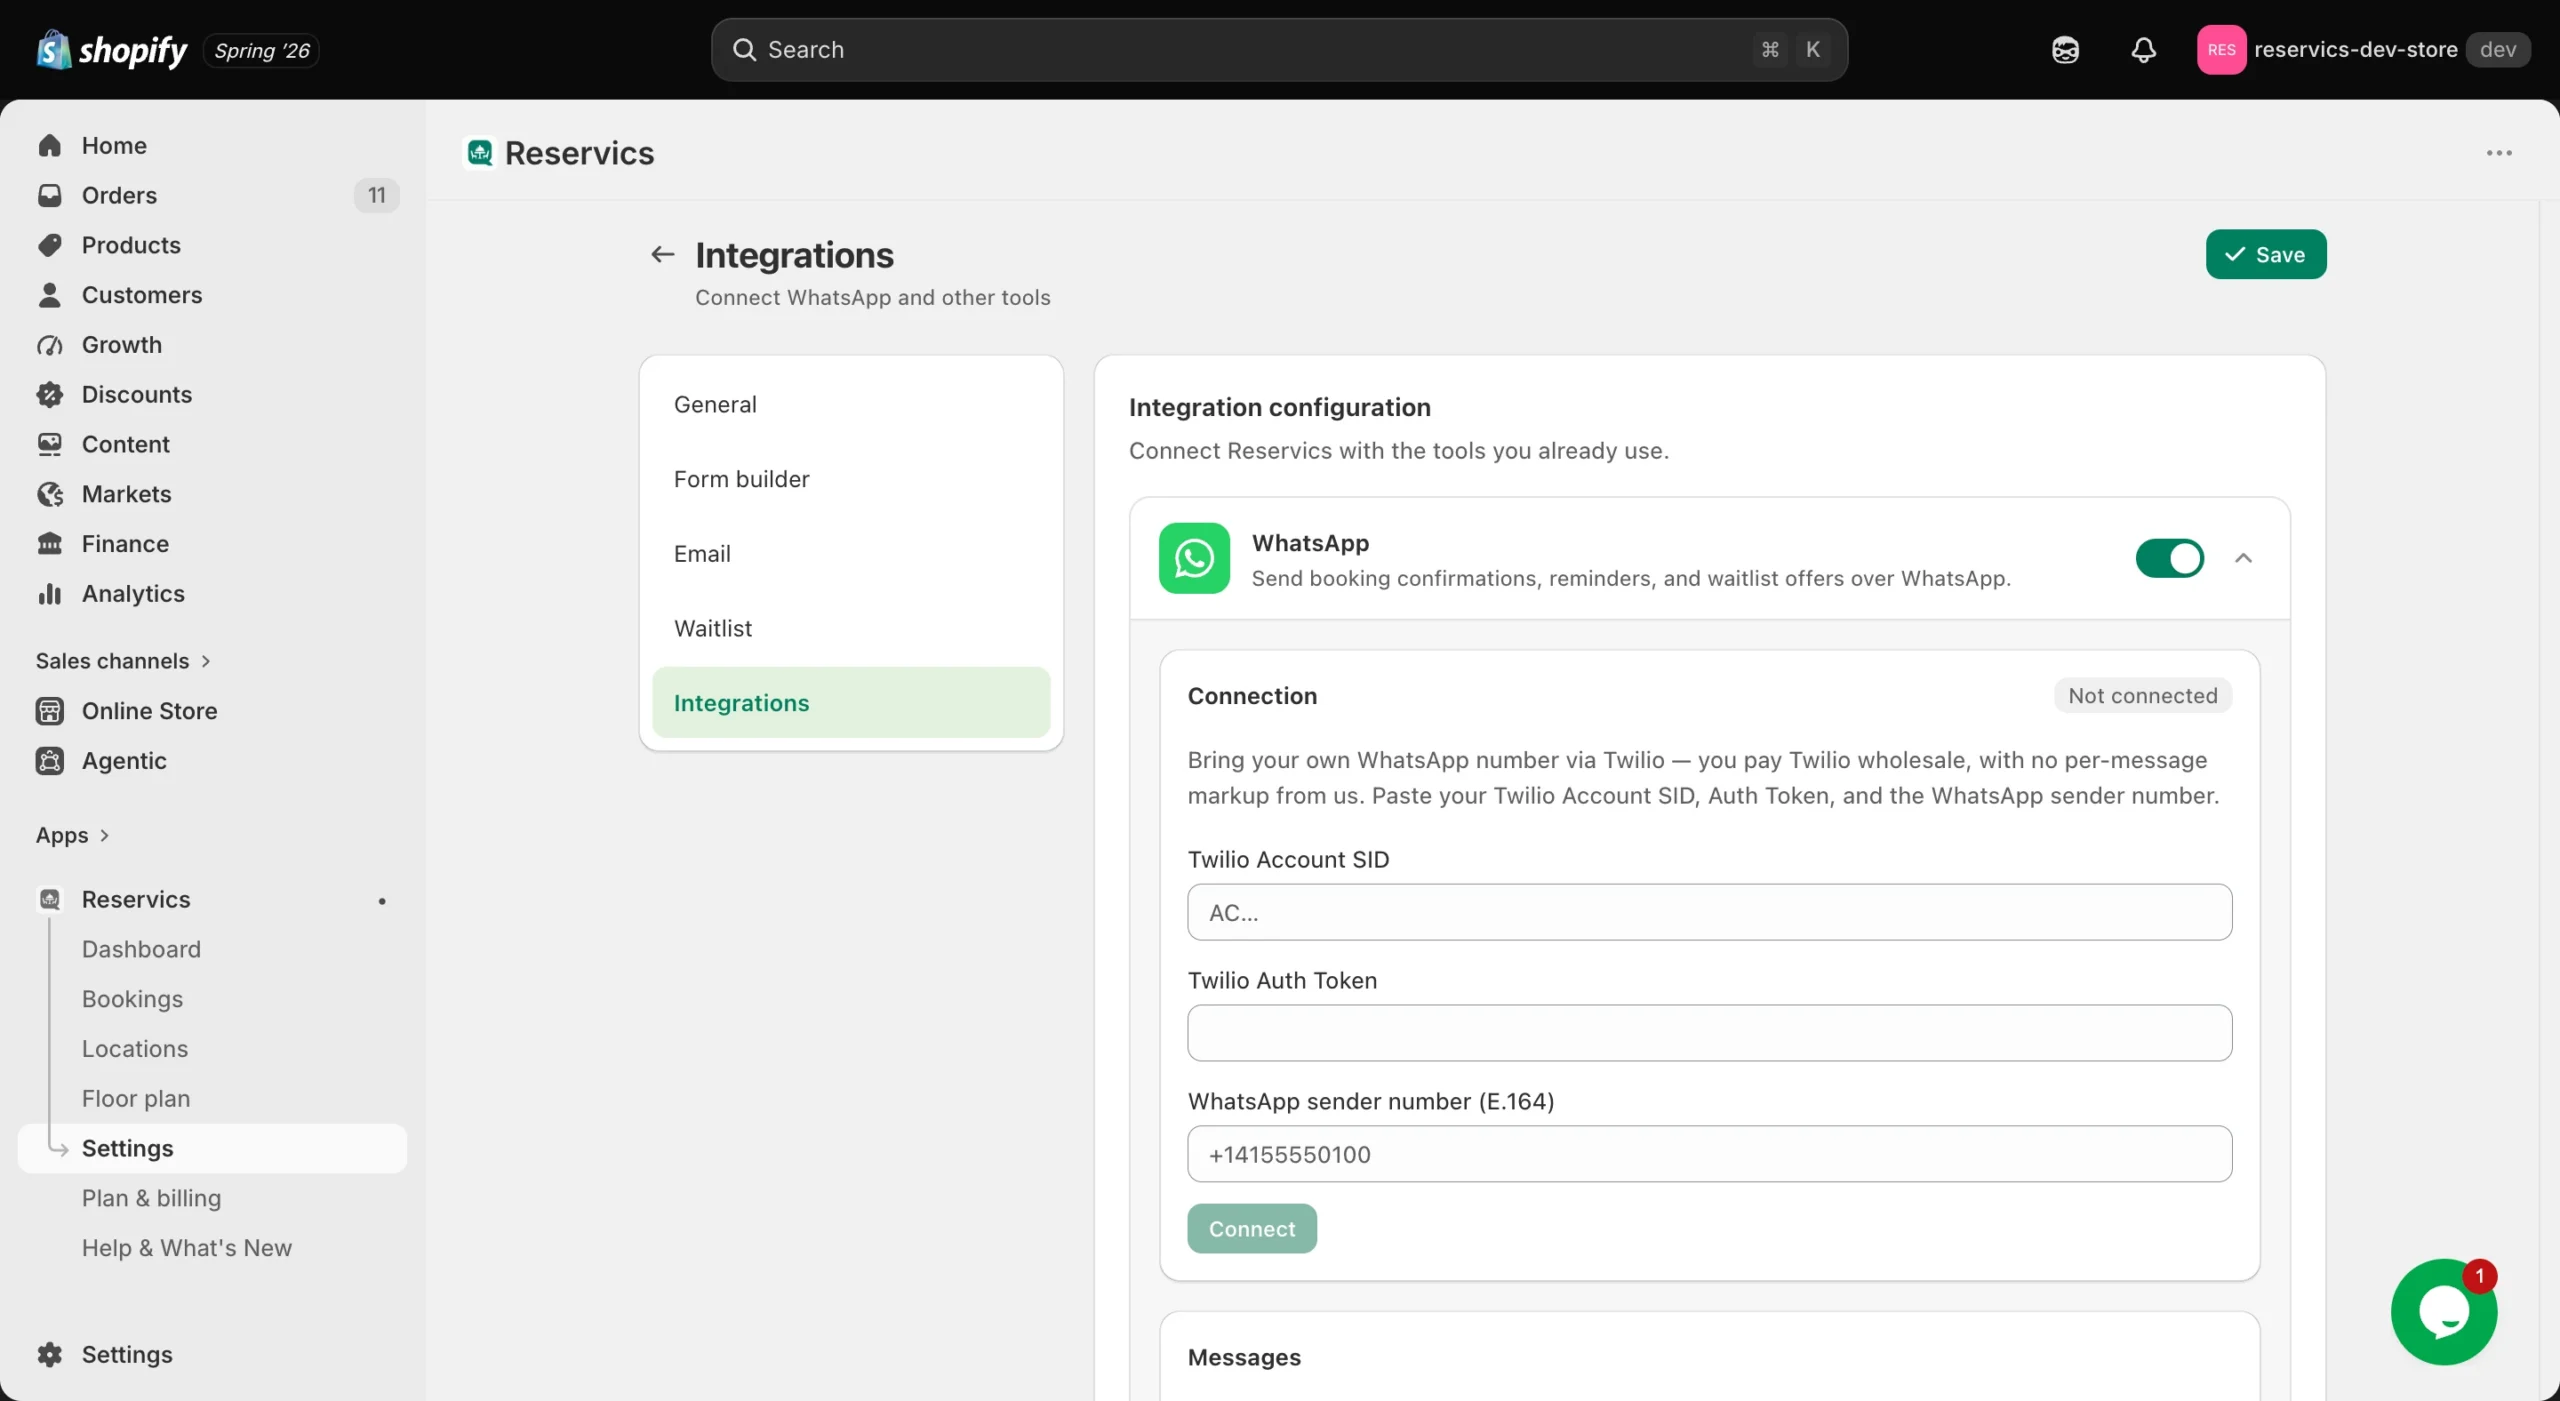
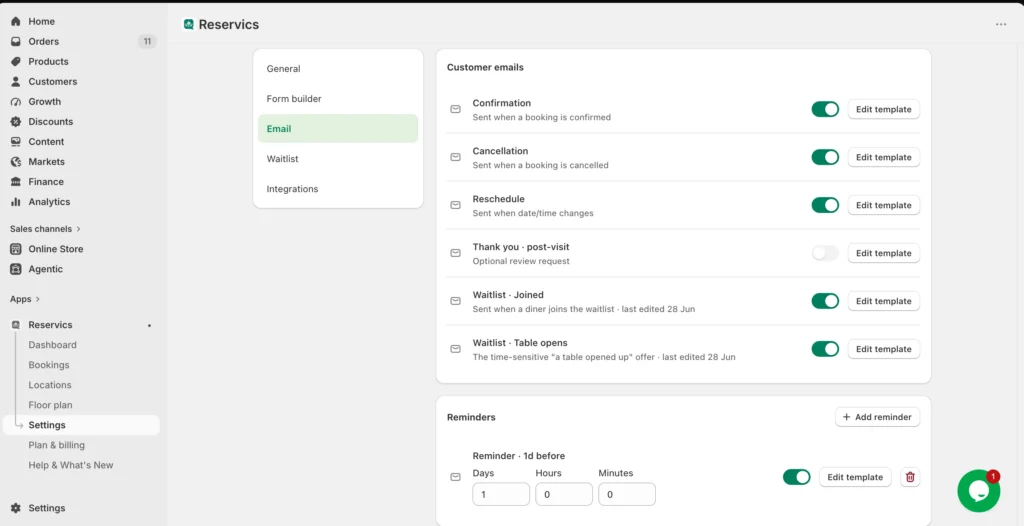
Reservics lets you send automated booking notifications by email on every plan and by WhatsApp on Pro and Advance. Open Settings, then Email Notifications to edit each template’s subject and body with placeholders like {{customer_name}} and {{time}}, and schedule reminders. To use WhatsApp, connect your own WhatsApp Business credentials under Settings, then WhatsApp, and let diners opt in on the booking form.
What gets sent and when #
Reservics covers the full booking lifecycle with separate templates. Each is sent automatically when its event happens.
| Template | When it is sent |
|---|---|
| Confirmation | A booking is confirmed |
| Reminder | A set number of minutes before the reservation start |
| Cancellation | A booking is cancelled |
| Reschedule | A booking’s date or time changes |
| Thank You | After the visit |
| Waitlist Joined | A diner joins the waitlist |
| Waitlist Offer | A freed seat is offered to a waiting diner |
A “Manage your booking” link is added automatically to the end of transactional emails, so diners can view or cancel their reservation with no login. All notifications are sent in the background and are best-effort, so a sending failure never blocks a booking.
Edit your email templates #
- In Shopify admin, open Reservics.
- Go to Settings, then the Email Notifications tab.
- Pick the template you want to change (for example, Confirmation).
- Edit the subject line and the body text.
- Insert placeholders where you want live booking details to appear.
- Save the template.
Placeholders you can use #
Drop these into any subject or body and Reservics fills them in for each diner.
| Placeholder | What it inserts |
|---|---|
| {{customer_name}} | The diner’s name |
| {{date}} | The reservation date |
| {{time}} | The reservation start time |
| {{party}} | The party size |
| {{code}} | The booking reference code |
| {{manage_url}} | The link to view, change, or cancel the booking |
| {{restaurant_name}} | Your restaurant’s name |
Schedule reminder emails #
Reminders are sent a set number of minutes before each reservation. This is how you cut no-shows with an automated reservation reminder email.
- Go to Settings, then Email Notifications.
- Open the Reminder template.
- Set how many minutes before the start time the reminder should send (for example, 1440 minutes for one day before).
- Add another reminder if your plan allows it (see the limits below).
- Save.
Connect a WhatsApp Business account #
WhatsApp uses your own WhatsApp Business credentials, so messages send from your number. You bring the credentials, and Reservics verifies them before saving.
- Make sure you are on the Pro or Advance plan. WhatsApp is not available on Free.
- Get your WhatsApp Business credentials: an Account SID and an Auth Token (Twilio-style).
- In Reservics, go to Settings, then the WhatsApp tab.
- Paste in your Account SID and Auth Token.
- Save. Reservics verifies the credentials before storing them. If verification fails, the details are not saved.
- Edit the WhatsApp templates, which follow the same lifecycle as email (Confirmation, Reminder, and so on).
Get Twilio Account Info #
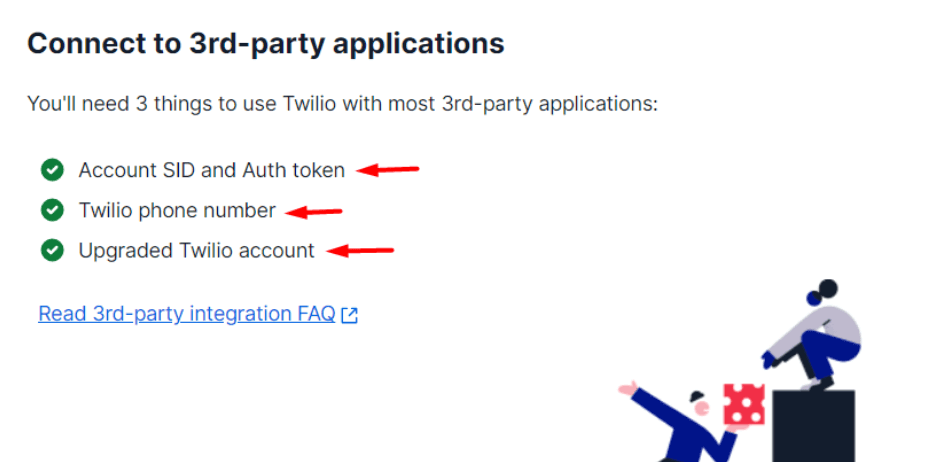
1) First of all, you need to sign up and sign in to your Twilio account from here. After login to the account, make sure that the following conditions are met.
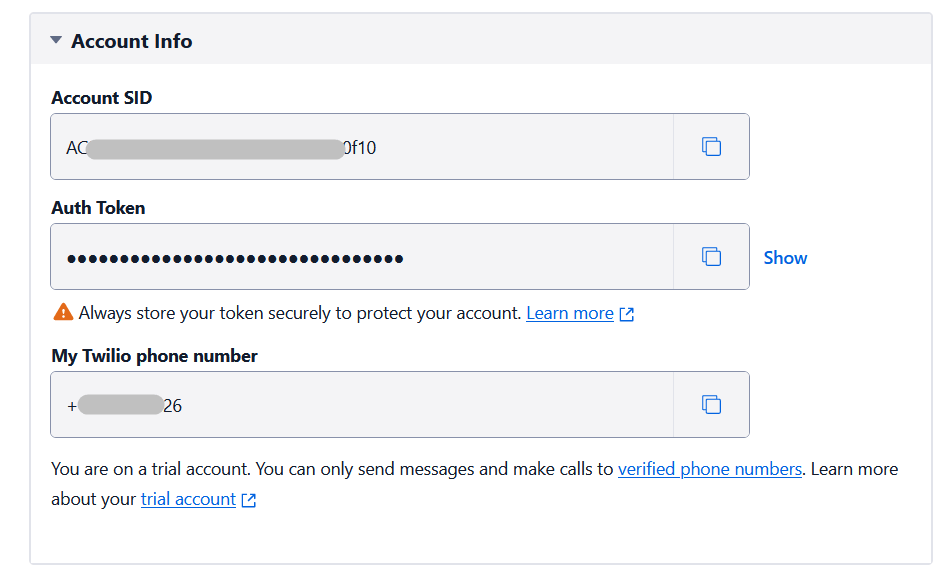
2) Now, go to the Account info section and you will find the Account SID and Auth Token.
Purchase a Number from Twilio #
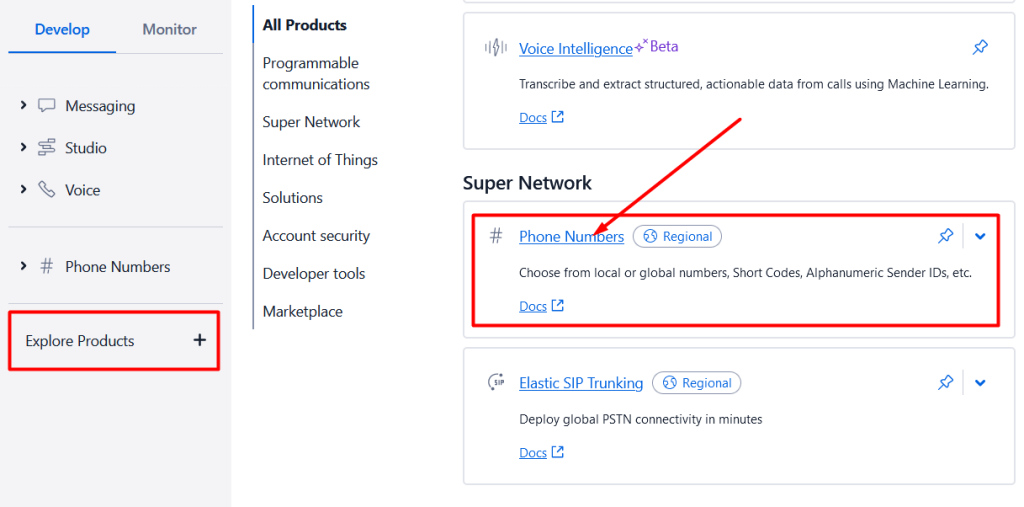
1)For purchasing a number, click on Explore Products from the left sidebar. and will see the “Phone numbers” option.
2) Click on Phone Number Options and will see the ” Buy New Number” button on the right corner of the account.
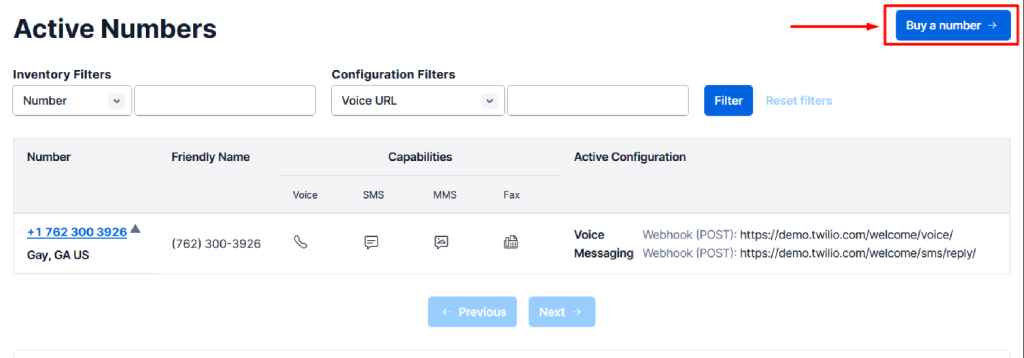
3) Click on the “Buy a Number” button.
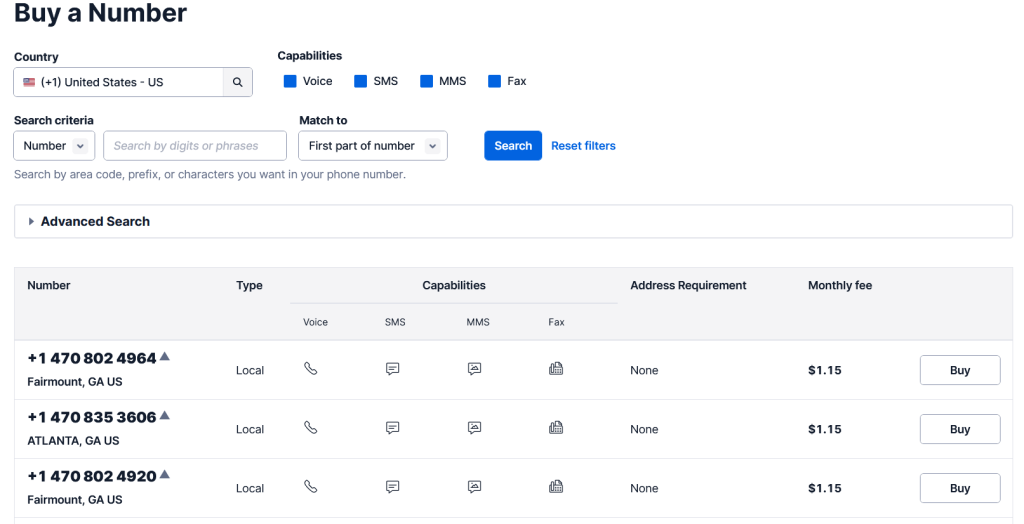
4) Now, select the country area code and type of the number you want to buy. You can choose from local, mobile, or toll-free numbers.
5) Click on the “Buy” button.
Once you have purchased the number, you will see it listed in your Twilio account. You can then start using the number for your business.
Note: Here are some additional things to keep in mind when purchasing a number from Twilio:
- The price of a number varies depending on the country, area code, and type of number.
- Some numbers may require you to provide additional information, such as your business name or address.
- You may need to wait for the number to be provisioned before you can start using it.
Enable your WhatsApp Sender #
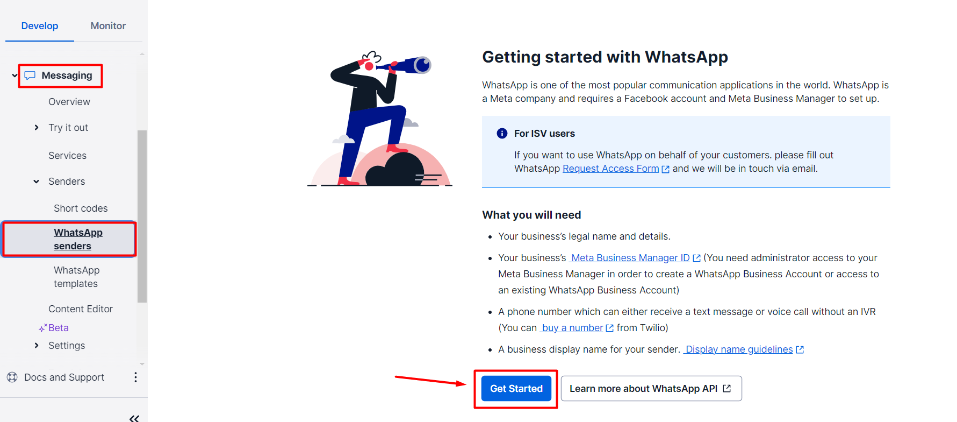
To enable WhatsApp sender, navigate to the
1) Explore Products -> Messaging tab -> Senders -> WhatsApp Senders.
2) Now, click on the “Get Started” button to start verifying your Sender ID.
Insert Key in Reservics Settings #
Navigate to the Reservics -> Settings -> Integrations -> Twilio Messaging and insert the Twilio Account SID, Auth Token and Phone Number and save changes.